Microsoft Outlook is one of the best software / tool to manage multiple email accounts. Outlook can be used on both computers and mobiles so, it’s quite easy to access all mails anywhere. You may send hundreds of mails everyday using outlook but sometimes you need to pretend like you are not easily accessible or reachable all hours. Yes, few users don’t give instant reply of client mails because they don’t want to show they are absolutely free in their time [On Few Occasions].
In this case user can easily schedule an outgoing email in outlook. Suppose you got the mail from client in morning but you don’t want to send instant reply but want to send during evening so, in this case users can set up delay outgoing mail in Outlook. In Outlook users can schedule email with easy steps. Here we present the step by step guide of how to schedule an email in Microsoft outlook.
This below step by step guide is from Microsoft Outlook 2007 version so, don’t get confused with the images. This guide will work on other Outlook version as well including 2010 and 2013.
How to Schedule an Outgoing Email in Outlook
Step 1: Open Microsoft Outlook and click on “New” button

Step 2: Click on “Options” tab
Once your new mail window opens then directly clicks on “Options” from menu bar.

Step 3: Click on “Delay Delivery”

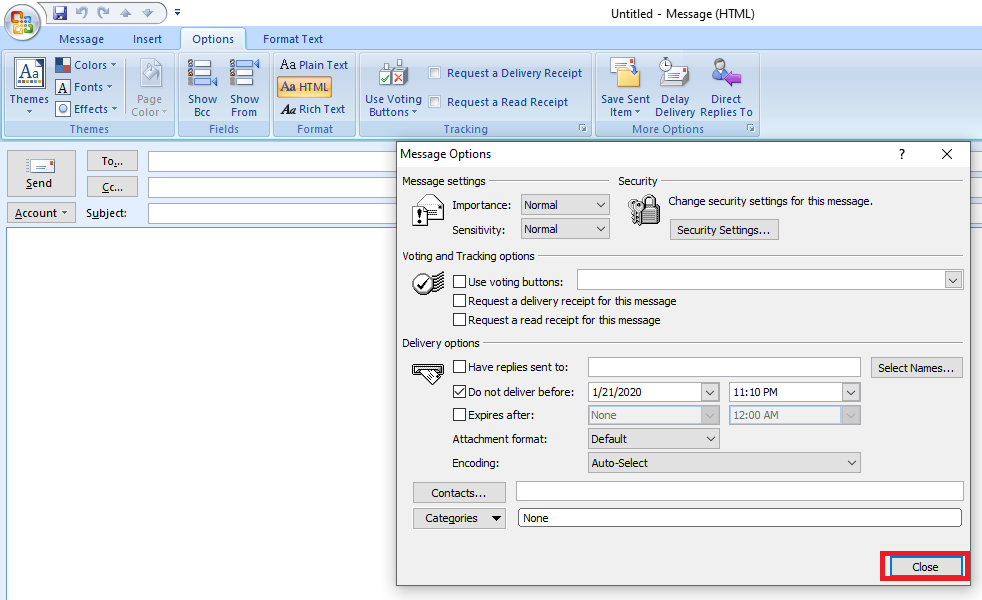
Step 4: Now Select the date and time you’d like to send the message in the Do not deliver before section.
Don’t forget to check “Do not delivery before” option while setting up date and time.

Step 5: Click on Close button
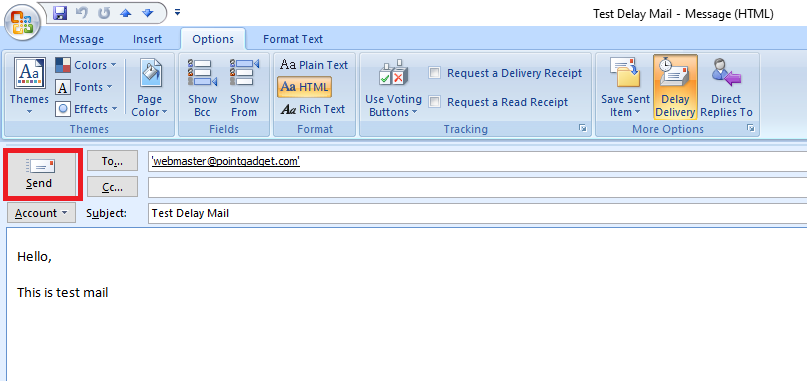
Step 6: Type mail and Click on Send
This is very important window so, make sure you set complete mail. Once you type the entire mail and click on send button then this mail is all set to send on given date and time.
Step 7: Check mail in Outbox
Once you click on send button then the mail will appear in outbox until the schedule time. If you change your mind to cancel the mail schedule then don’t worry you can still do it.

Step 8: Open Mail from Outbox
Now open scheduled mail from Outbox.
Step 9: Click on Options Menu
Step 10: Click on Delay Delivery Option
Step 11: Uncheck “Do not Deliver Before”
Once you click on “Delay delivery” button then one pop up will open and now just uncheck the “Do no Deliver Before” option and your mail will cancel the schedule option.